
Lesson 7: Getting Started with WordPress: Building a Simple Website.
Getting Started with WordPress: Building a Simple Website
Lesson Overview:
In this lesson, students will learn the fundamentals of creating a simple website using WordPress, one of the most popular content management systems (CMS) in the world. By the end of the lesson, they will understand how to install WordPress, choose a theme, add content, and customize their website’s layout. Real-world examples will help illustrate how WordPress powers millions of websites for businesses, blogs, and eCommerce platforms.
What is WordPress?
Explanation:
WordPress is an open-source content management system (CMS) used to create websites without needing to write code. It powers over 40% of all websites on the internet today. WordPress offers a user-friendly interface, allowing users to build websites with various themes, plugins, and widgets.
Real-World Example:
Some of the most famous websites built using WordPress include The Walt Disney Company, TechCrunch, and Kidspreneurs Uganda. Whether it’s a blog, a business site, or an online store, WordPress provides flexibility for all types of websites.
Getting Started with WordPress Installation
Explanation:
Before building a WordPress site, you need to install WordPress. This can be done in two ways:
- WordPress.com: A hosted platform that takes care of hosting and setup for you. It’s great for beginners but has limited customization options.
- WordPress.org: A self-hosted version that gives you full control over the website’s customization. It requires purchasing a domain name and hosting plan.
Steps to Install WordPress:
- Choose a Domain Name: This is the name of your website (e.g., www.mybusiness.com).
- Purchase Web Hosting: You’ll need a hosting provider like Bluehost, SiteGround, or HostGator to store your website’s files online.
- Install WordPress: Most hosting providers offer one-click WordPress installations.
Real-World Example:
Imagine you’re setting up a website for your new bakery business, called “Sweet Delights.” You decide on the domain name www.sweetdelights.com and purchase hosting from SiteGround. After that, you install WordPress with a few clicks and you’re ready to build your site.

Read on how to install WordPress
Choosing a WordPress Theme
Explanation:
Themes control the appearance and layout of your WordPress website. WordPress has thousands of free and paid themes to choose from, each with its own unique style. Themes can be customized to match your brand or vision.
How to Choose a Theme:
- Go to Appearance > Themes in your WordPress dashboard.
- Search for free themes or upload a premium theme.
- Install and activate the theme.
Real-World Example:
You’re building a website for your bakery and want it to look inviting and fun. You browse the WordPress theme library and find a theme called “Bakery Delight”, which has bright colors, a clean layout, and built-in sections for showcasing products like cakes and pastries. You install and activate this theme for your website.
[Courtesy Video]
Adding Content to Your Website
Explanation:
Content is the heart of any website. WordPress makes it easy to add pages, posts, images, and other media to your site. The two most important types of content in WordPress are:
- Pages: Static content like the Home page, About Us, or Contact Us page.
- Posts: Dynamic content, mainly used for blogs and articles.
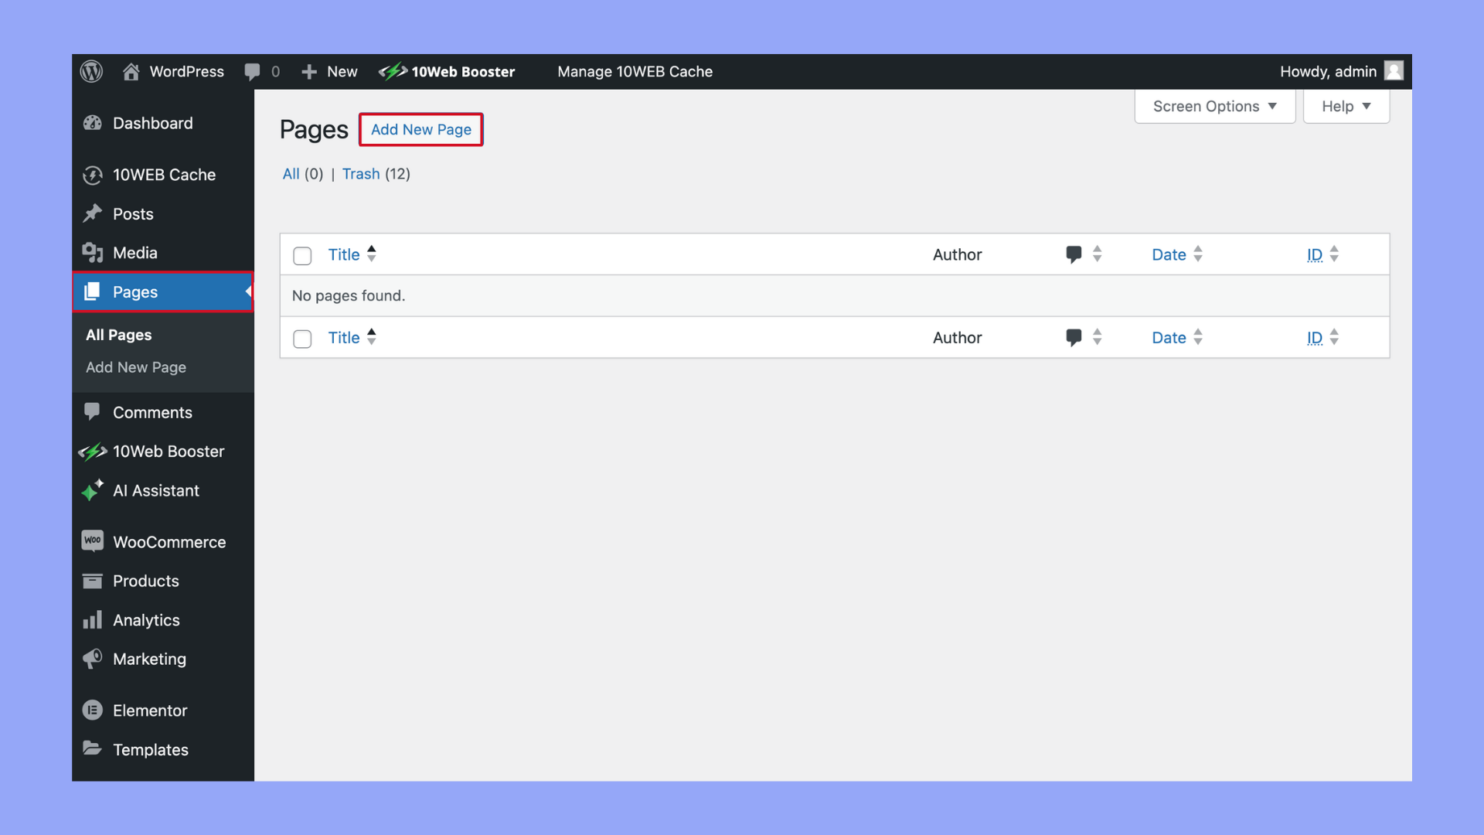
How to Add a Page:
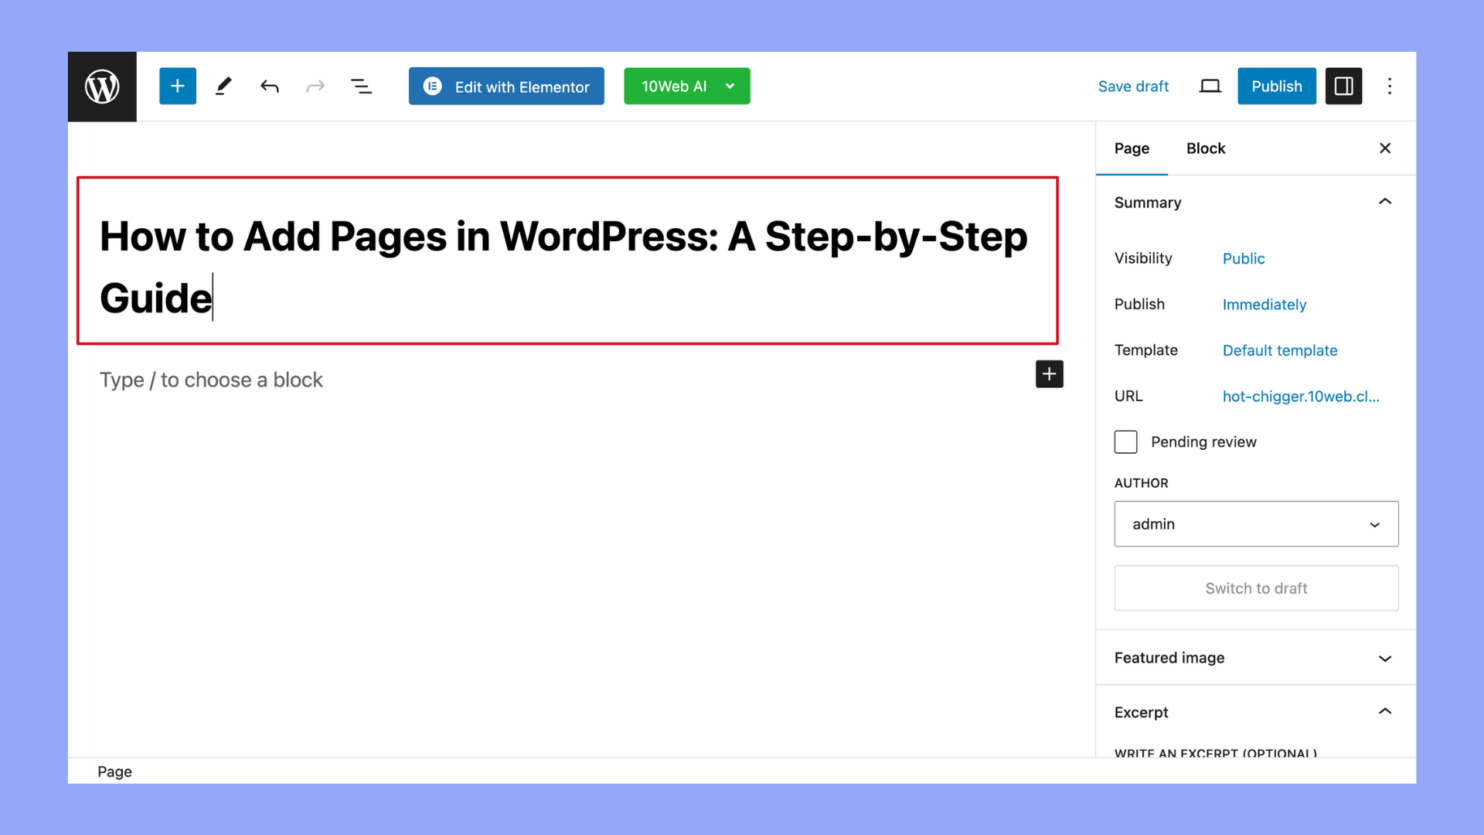
- Go to Pages > Add New Page in the dashboard.
- Add a title (e.g., “About Us” i.e. replace the text in the red box with About Us).
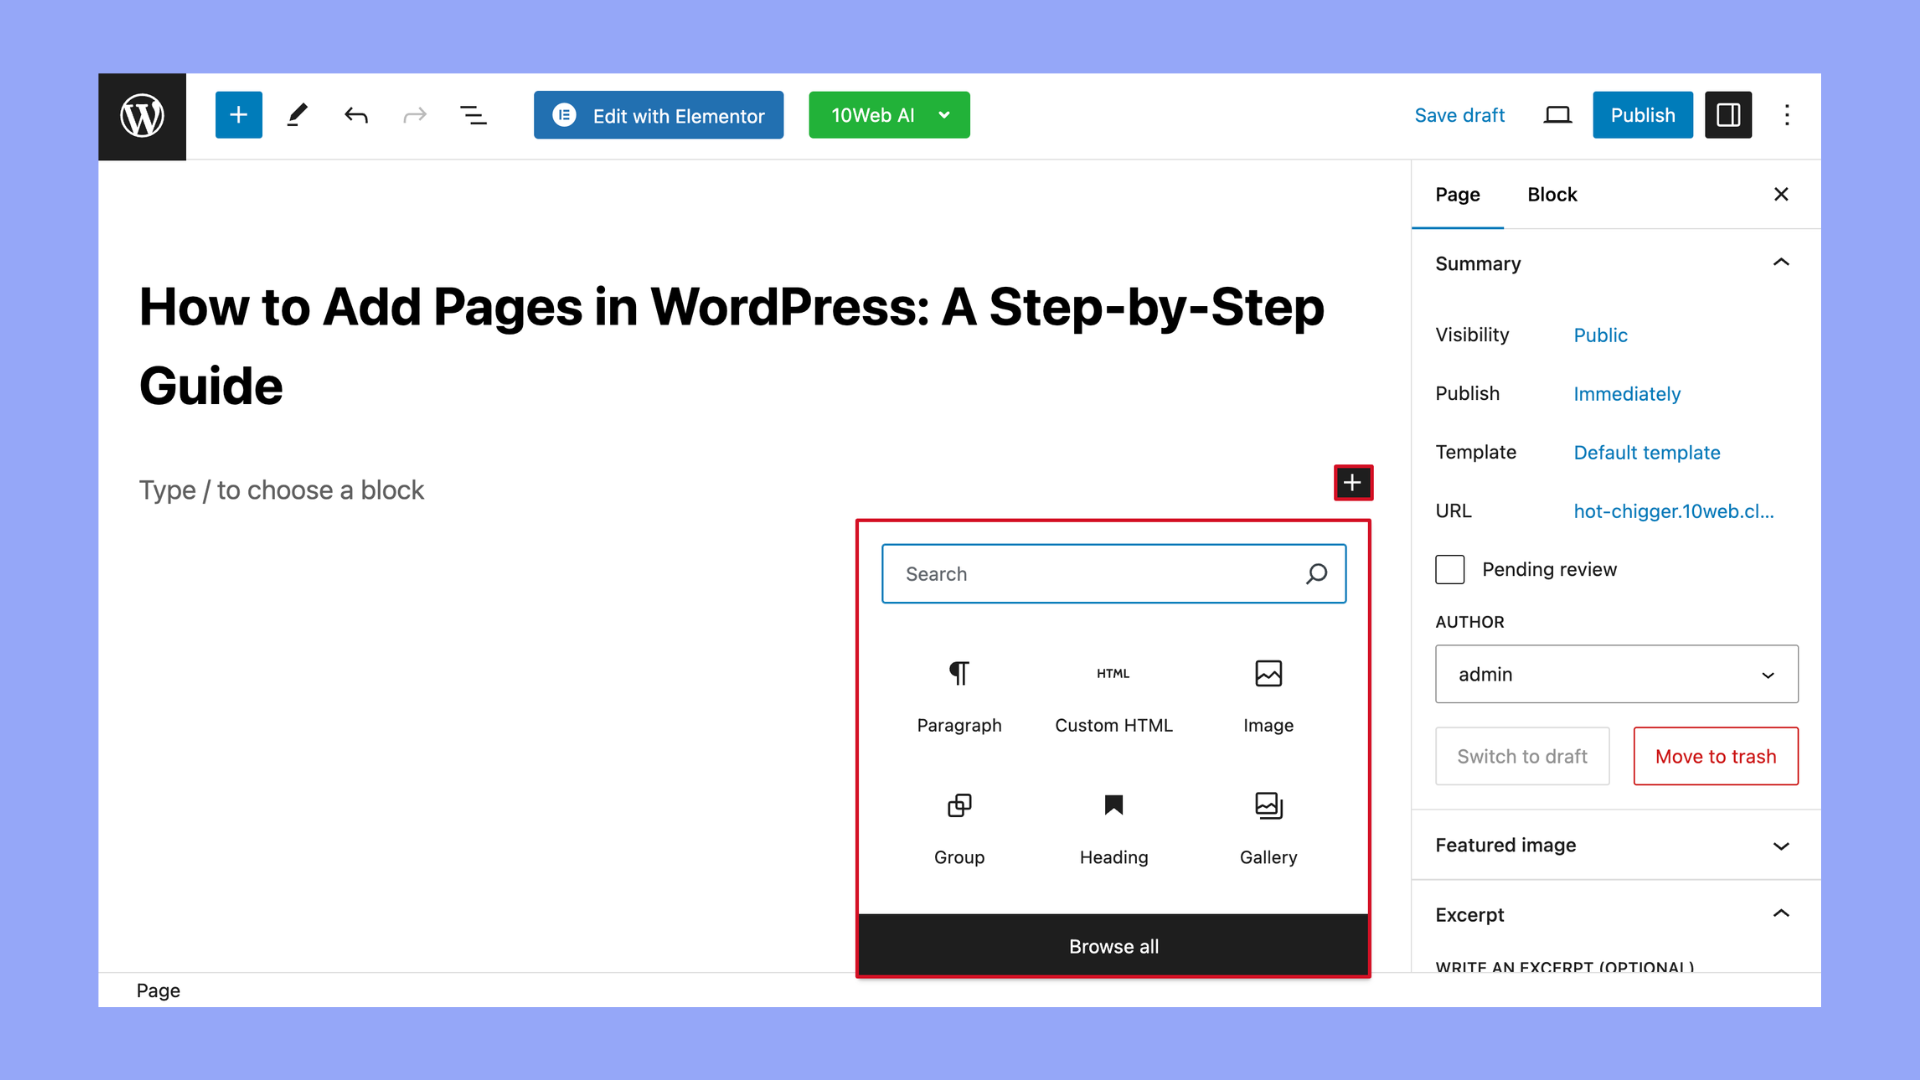
- Write your content in the editor and add images, videos, or other media.
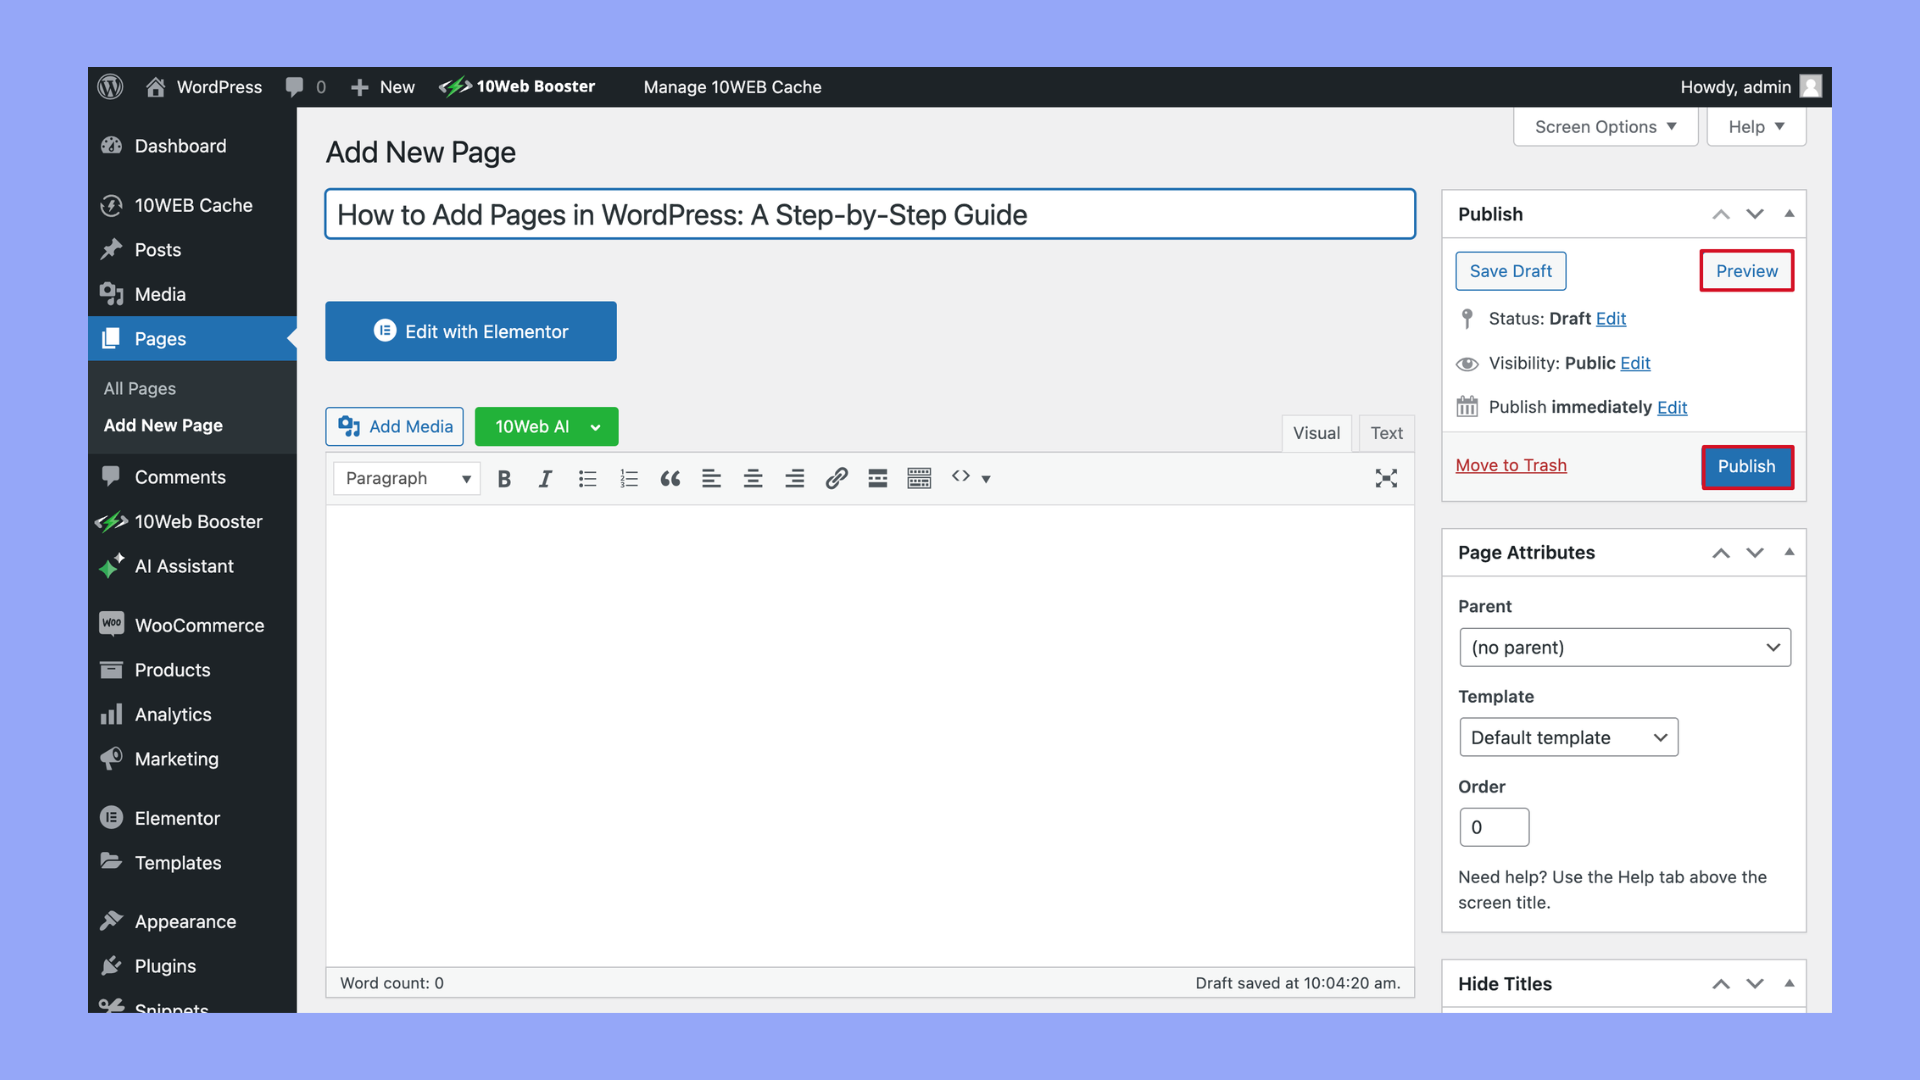
- Use the Preview button on the right to view your page before it goes live.
- Click Publish to make your page accessible to visitors.
Real-World Example:
For your bakery site, you want to add an About Us page that tells the story of how your business started. You go to Pages > Add New, write a short bio, and upload photos of your bakery. After publishing the page, visitors can learn more about you when they visit the website.
Customizing Your Website Layout
WordPress allows you to customize your site’s layout using widgets and menus. Widgets are small blocks that add functionality, such as contact forms, social media links, or recent posts. Menus organize your website’s navigation.
How to Customize Your Layout:
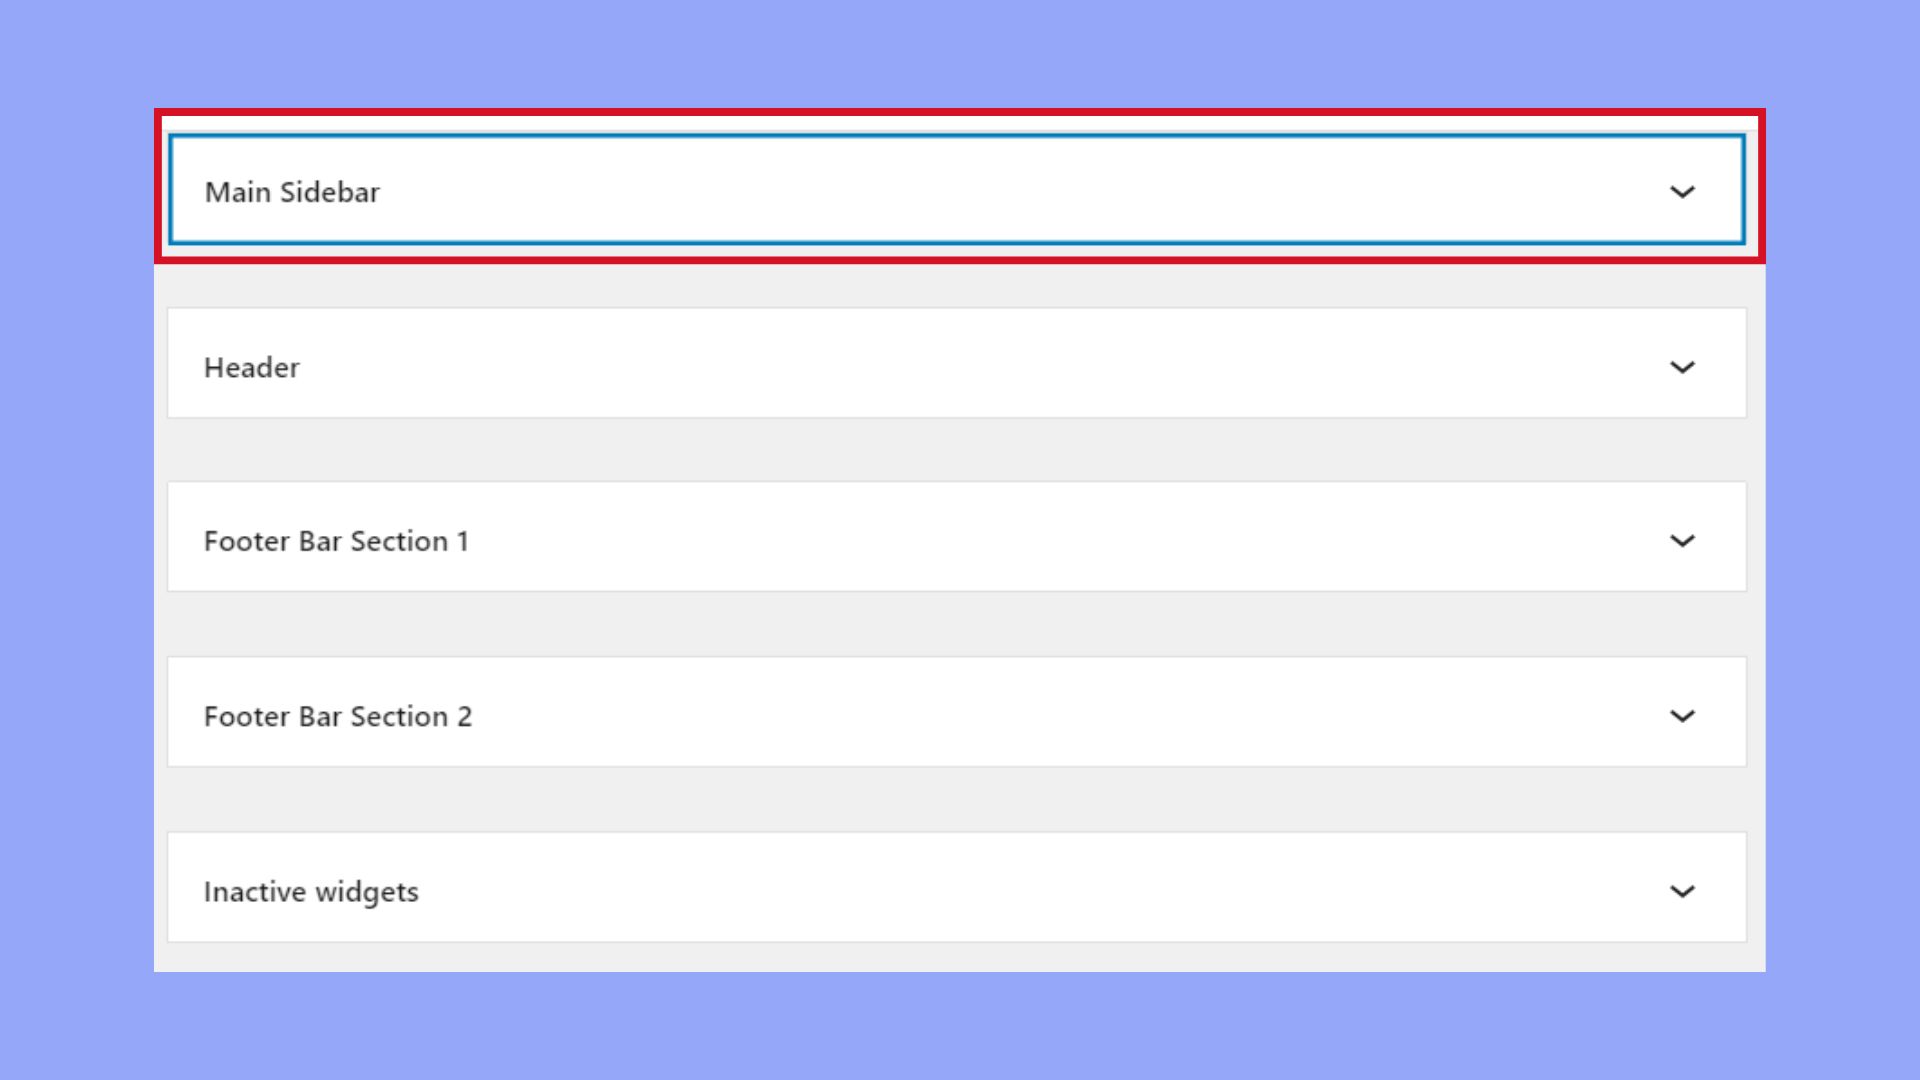
- Go to Appearance > Widgets to add or remove widgets (e.g., social media icons, recent posts).
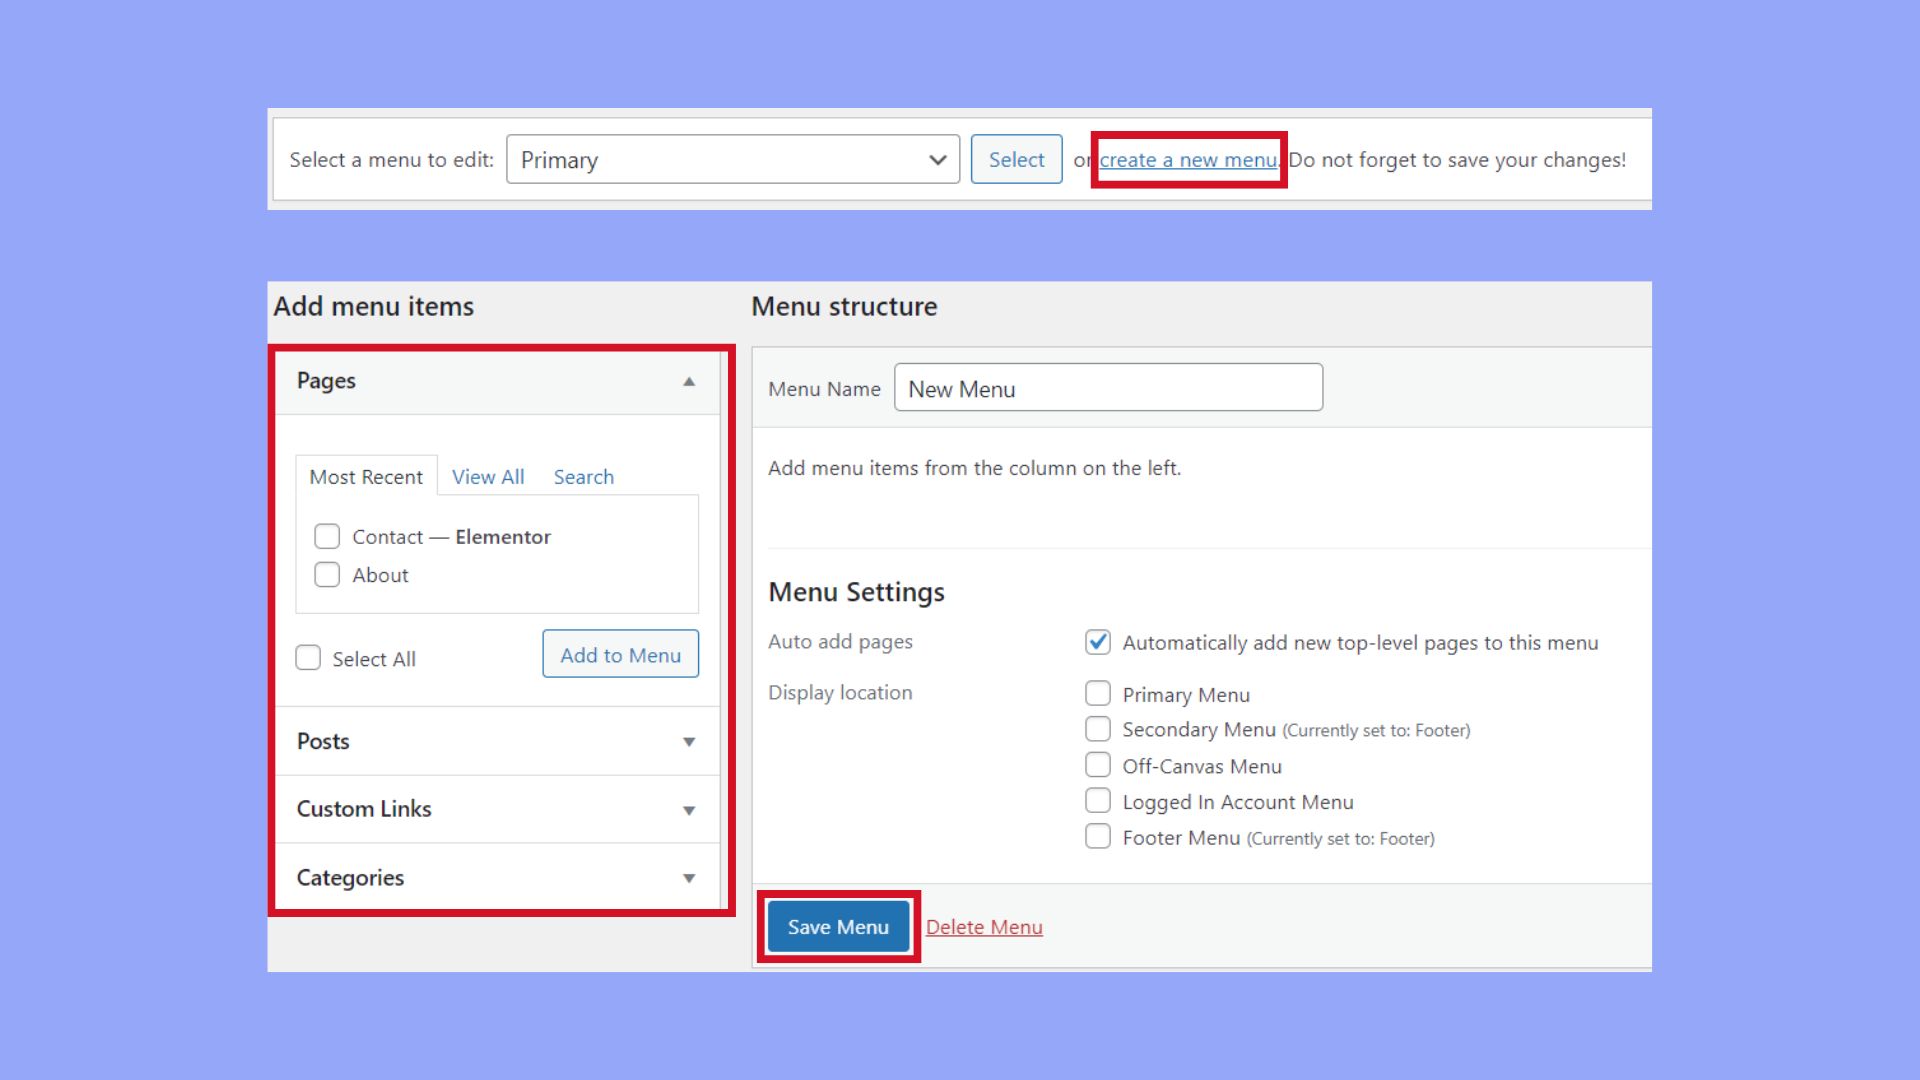
- Go to Appearance > Menus > Select Create a new menu and give it a name > Add pages, categories, and custom links as menu items.
- Once you’re logged into your WordPress dashboard, navigate to Appearance > Customize to open the WordPress Customizer. Here you’ll find a suite of options such as layout adjustments, color schemes, font choices, and widget positions. Each theme may offer different customizer options based on its features and capabilities.

Real-World Example:
On your bakery website, you add a Contact Form widget in the footer so customers can easily reach out. You also customize the navigation menu to include “Home,” “About Us,” “Menu,” and “Contact Us” pages. This makes it easy for visitors to find what they need.
6. Publishing and Maintaining Your Website
Explanation:
Once your content is ready and the design looks good, it’s time to publish your website! After publishing, maintaining your site regularly is crucial. This includes updating WordPress, themes, and plugins to ensure security and functionality.
Real-World Example:
After setting up your bakery website, you publish it live. Moving forward, you’ll update it regularly with new products, blog posts, and seasonal promotions. You also keep an eye on your website’s health by performing regular updates and backups.